Fields
Submitting your field
Step-by-step guides to setting up your fields for agriculture analysis.
Navigate to the fields module
To access the fields module you need to navigate to the fields module in the console. To do so click on the fields module in the left sidebar.
Create a new field
Field Information
To create a new field click on the new field button in the top right corner of the fields module. This will open a new field form
- Name: The name of the field you are creating
- Industry: As of now the only industry available is agriculture. this will be expanded in the future to include other industries and solutions.
- Analysis Date: The analysis date is the date you would like to analyze your field. This date has to be either in the past or present and cannot be older than 18 months. This only applies to one time payment fields. Fields that are purchased with a subscription will be analyzed monthly.
We are not responsible for erroneous analysis results due to incorrect analysis dates. Please make sure that the analysis date is correct. Sampling cannot be performed when there is snow on the ground, so please select dates when there wasn’t snow, otherwise your soil sampling will be inaccurate.
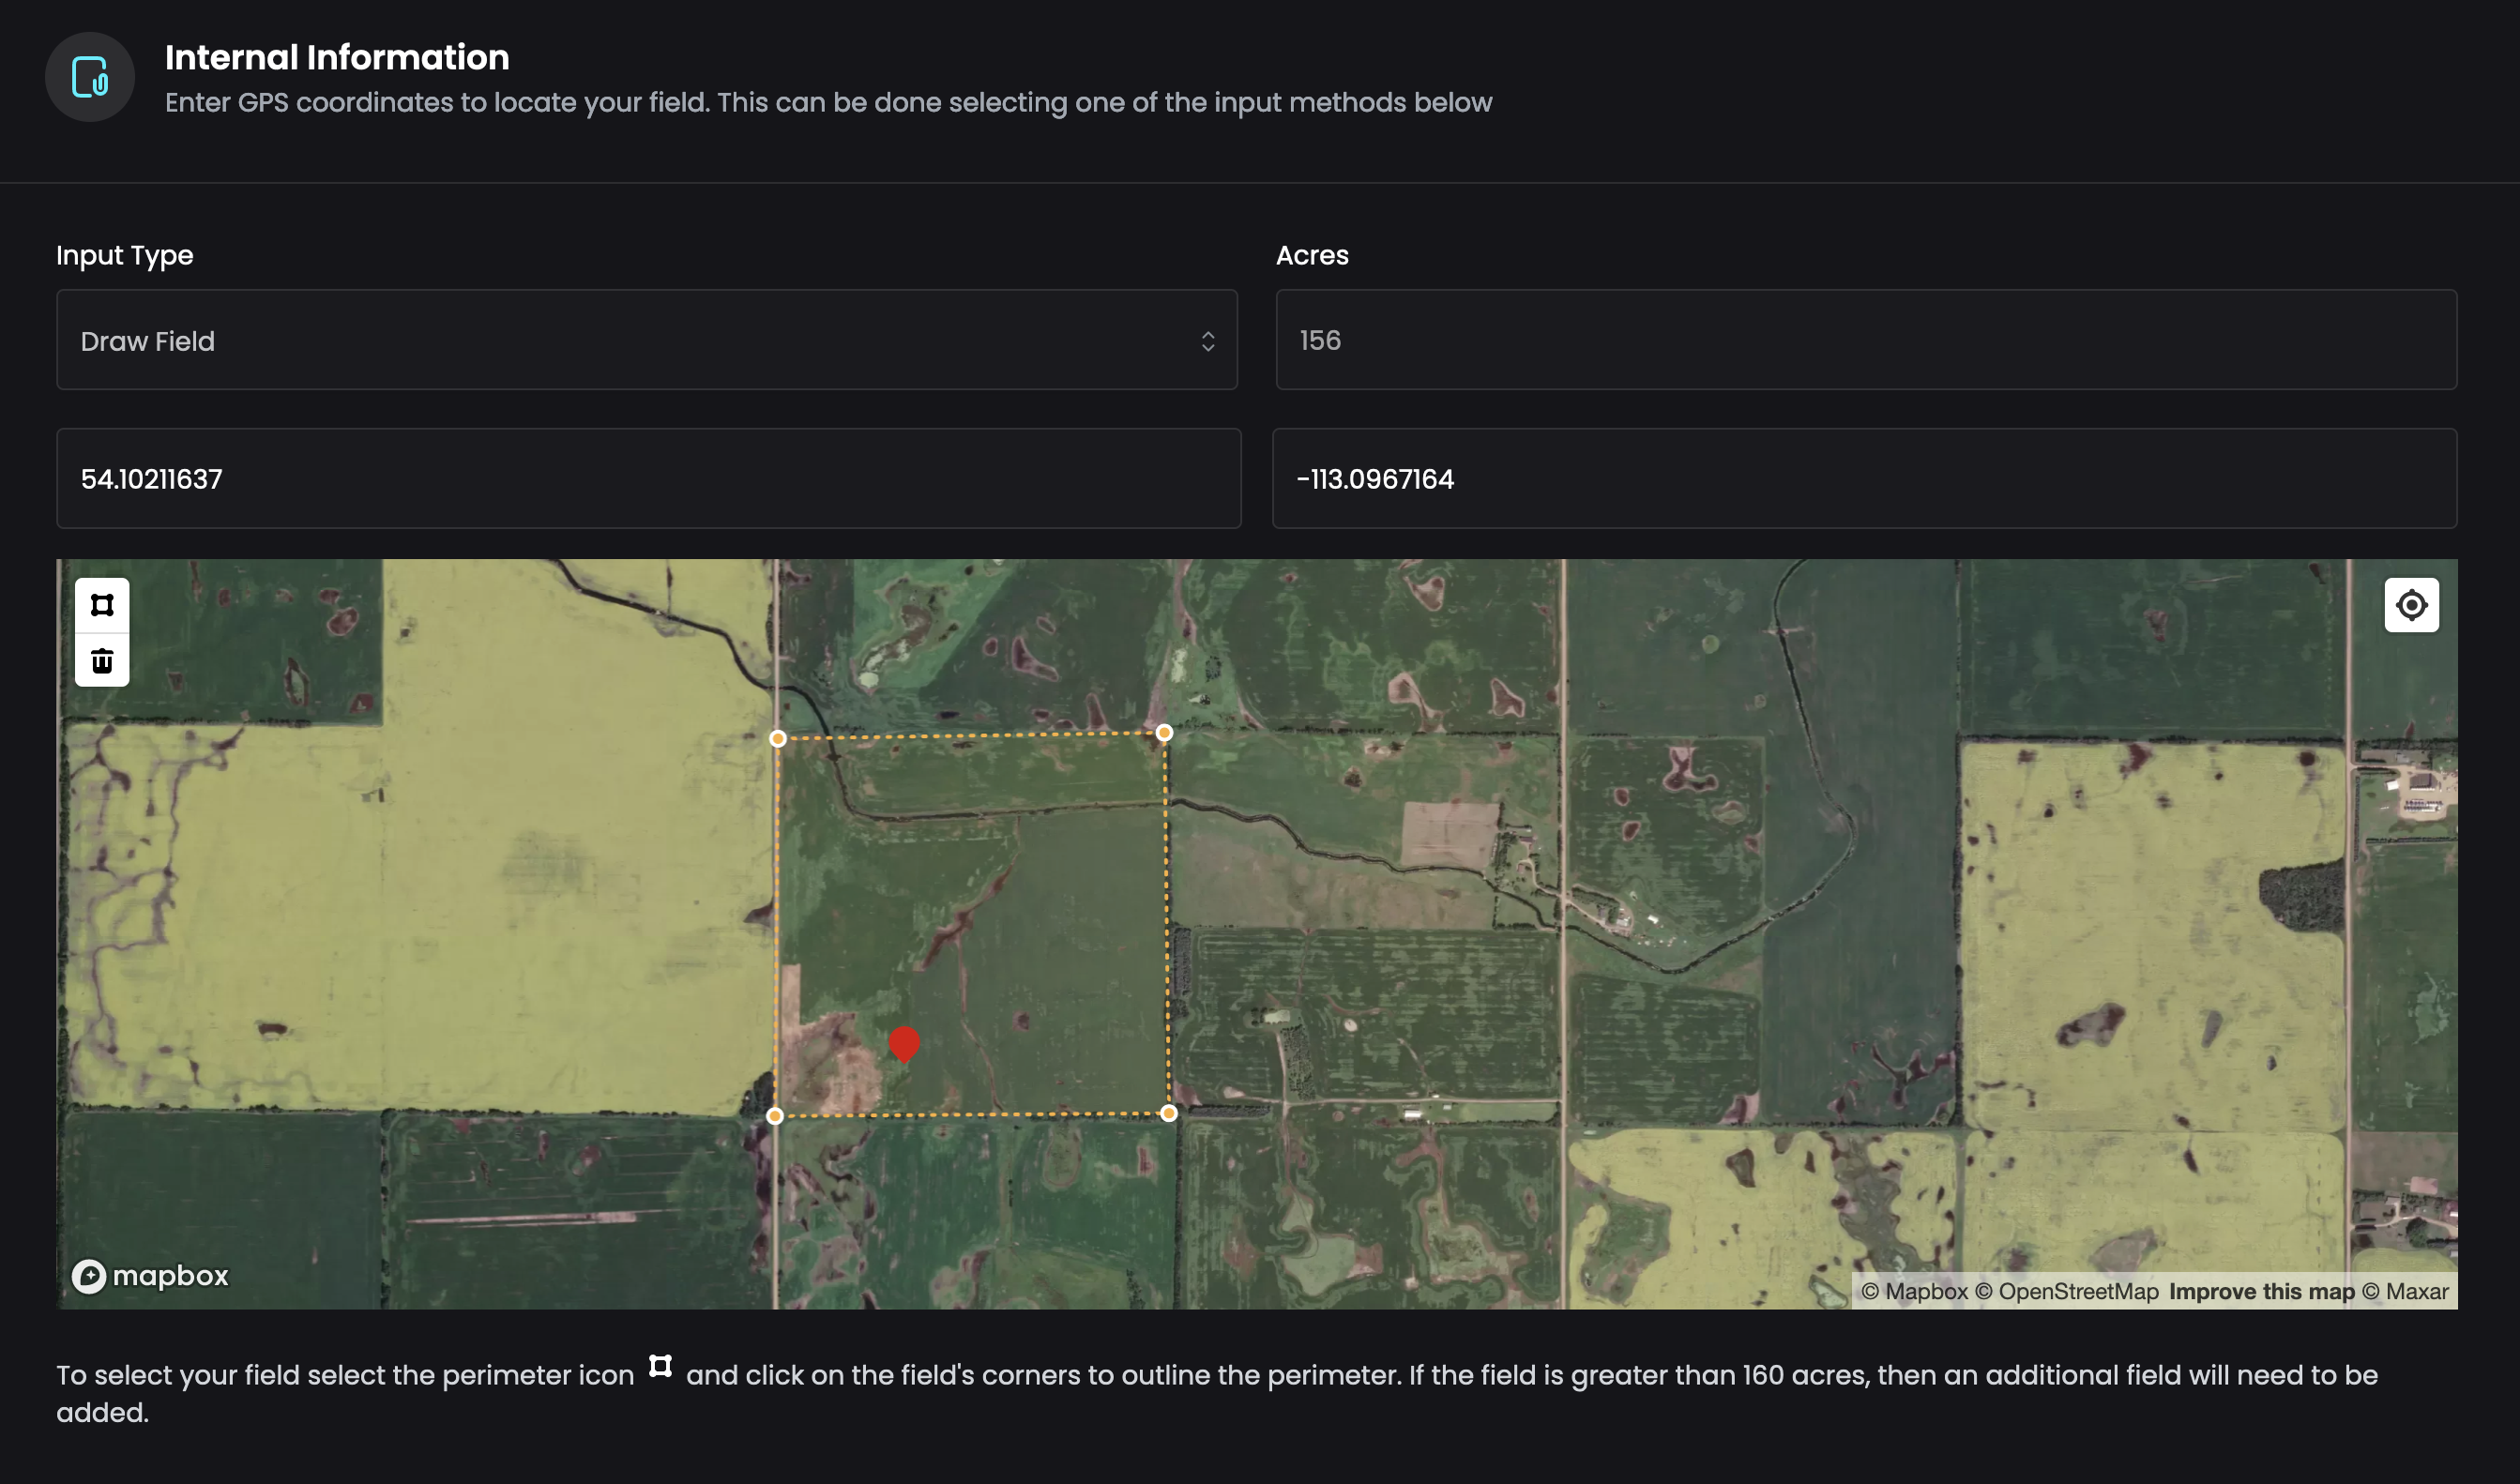
Field Location
The browser should prompt for your permission to use your location for you to easily locate your field. If not you can also use the latitude and longitude fields to input your field location. Or you can click on the “My Location” icon in the top right corner of the map to get you close to your farm.
To input a field location you will have to find your field on the map. Once you have zoomed in and found your field, click on the perimeter button in the top left corner of the map, and draw the field’s perimeter using points. If possible, please go around any sloughs, yards, trees, waterways, etc. that you would like to have excluded from the soil sampling. Use as many points as necessary to make your perimeter as accurate as possible. If the field is greater than 64 hectares, then an additional field will need to be added. When the perimeter is complete, move your browser away from the last perimeter point, and the back over last perimeter point and a pointer will appear, click the last perimeter point with the mouse pointer to close out your field perimeter. Hectares will be calculated automatically. If you would like to redraw your field, just click on the perimeter icon again, the original drawing will go blue, just ignore that, and continue with your new drawing, the old one will disappear after the second point.
Pricing and Plan for One Time Payment Fields
Pricing and plans may vary from time to time, and from region to region. If you don't wish to subscribe to a plan, you can purchase a one time payment field. By submitting a field without a plan selected you will be prompted to pay for the field to start analysis. This will give you access to the field for the analysis date you selected and the results will be processed only once. All of this should be displayed on the pricing plans. As samples/hectare rises, price rises.
Pricing and Plan for Subscription Fields
If you wish to receive monthly results of your field, you can purchase a subscription field. This will give you access to the field for the analysis date you selected and the results will be processed monthly. On subscription plans you have a maximum of hectares that you can submit per plan allowance. If you need to submit more than the plan allows for, you can upgrade to a higher plan.
Confirmation
A confirmation message will be displayed after you have successfully created a new field. You can view sampled hectares which are represented by a pin on the map. You can still edit your field by clicking on the edit button on the confirmation message. Once analysis starts you will not be able to edit your field.